
Tab 1
Tab 2
Tab 3

Grow Something Magical, One Jar at a Time!
Starting native seeds like milkweed can be a challenge. Many require cold stratification, a process of keeping seeds cold and moist for 30 days or more to mimic winter conditions. It works, but it’s time-consuming and not always reliable.
That’s why I was excited to discover a method called Jarmination, created by Monarch enthusiast Brad Grimm of Grow Milkweed Plants. With Brad’s permission, I began experimenting with his process and, over time, crafted my own version with a few key changes and improvements that worked well for me. I now call it Magical Sprouts Potion.
What Is Magical Sprouts Potion
Magical Sprouts Potion is my take on water germination, a fun jar-based method that skips cold stratification altogether. Instead of refrigerating your seeds, you soak them in distilled water and then plant them in potting mix inside a mason jar to create a mini greenhouse.
In Brad Grimm’s original method, seeds are soaked for 24 hours before planting. After testing different variations, I’ve found that soaking them for 3 to 5 days produces more consistent germination results, especially for harder-to-sprout native seeds. For seeds that typically require more than 30 days of cold stratification, I soak them for the full 5 days to help improve success. That adjustment has made a big difference, and it’s one of the ways I’ve added my own twist to the process.
I’ve also experimented with different types of soil. In my experience, coconut coir-based potting mix works much better inside the jars. Other standard potting mixes often repel water, causing it to sit on top or separate from the soil entirely. The coconut coir blend absorbs water more evenly and maintains the right level of moisture throughout the jar.
This method is inspired by Brad’s Jarmination technique, and I’m grateful for his permission to share his approach while building on it. You can explore his helpful resources below.
Brad Grimm’s Jarmination Resources:
- Jarmination Blog
- Also check out Lumberjill Garden on YouTube for a great visual walkthrough using Common Milkweed seeds.
My Magical Sprouts Potion Experiments
I began with Swamp Milkweed and had fantastic results. Encouraged, I expanded the Potion method to other native milkweeds:
-
Aquatic Milkweed (Asclepias perennis)
-
Butterfly Weed (Asclepias tuberosa)
-
Common Milkweed (Asclepias syriaca)
-
Green Comet Milkweed (Asclepias viridiflora)
-
Green Milkweed (Asclepias viridis)
-
Poke Milkweed (Asclepias exaltata)
-
Purple Milkweed (Asclepias purpurascens)
-
Tall Green Milkweed (Asclepias hirtella)
-
Whorled Milkweed (Asclepias verticillata)
I’ve also had success using Magical Sprouts Potion with other native seeds that usually need cold stratification, including:
-
Blazing Star (Liatris spp.)
-
Goldenrod (Solidago spp.)
-
New England Aster (Symphyotrichum novae angliae)
-
Purple Coneflower (Echinacea purpurea)
-
Tennessee Coneflower (Echinacea tennesseensis)
-
Wild Bergamot (Monarda fistulosa)
If you don’t have a sunny windowsill, no worries. I’ve tested this indoors with seedling heat mats and grow lights, and it works great. The added warmth and consistent light help seeds germinate even in the darker months.
Materials for Magical Sprouts Potion:
-
8 oz Regular Mouth Mason Jar
-
Distilled Water
-
Potting Mix (preferably coconut coir based)
-
Coconut Coir (can be mixed in separately for moisture retention)
-
Tablespoon Measuring Spoon
-
Cellophane or Plastic Wrap
-
Native Seeds (Milkweed, Coneflower, Aster, Goldenrod, etc.)
-
Optional: Seedling Heat Mat and Grow Lights
Magical Sprouts Instructions:
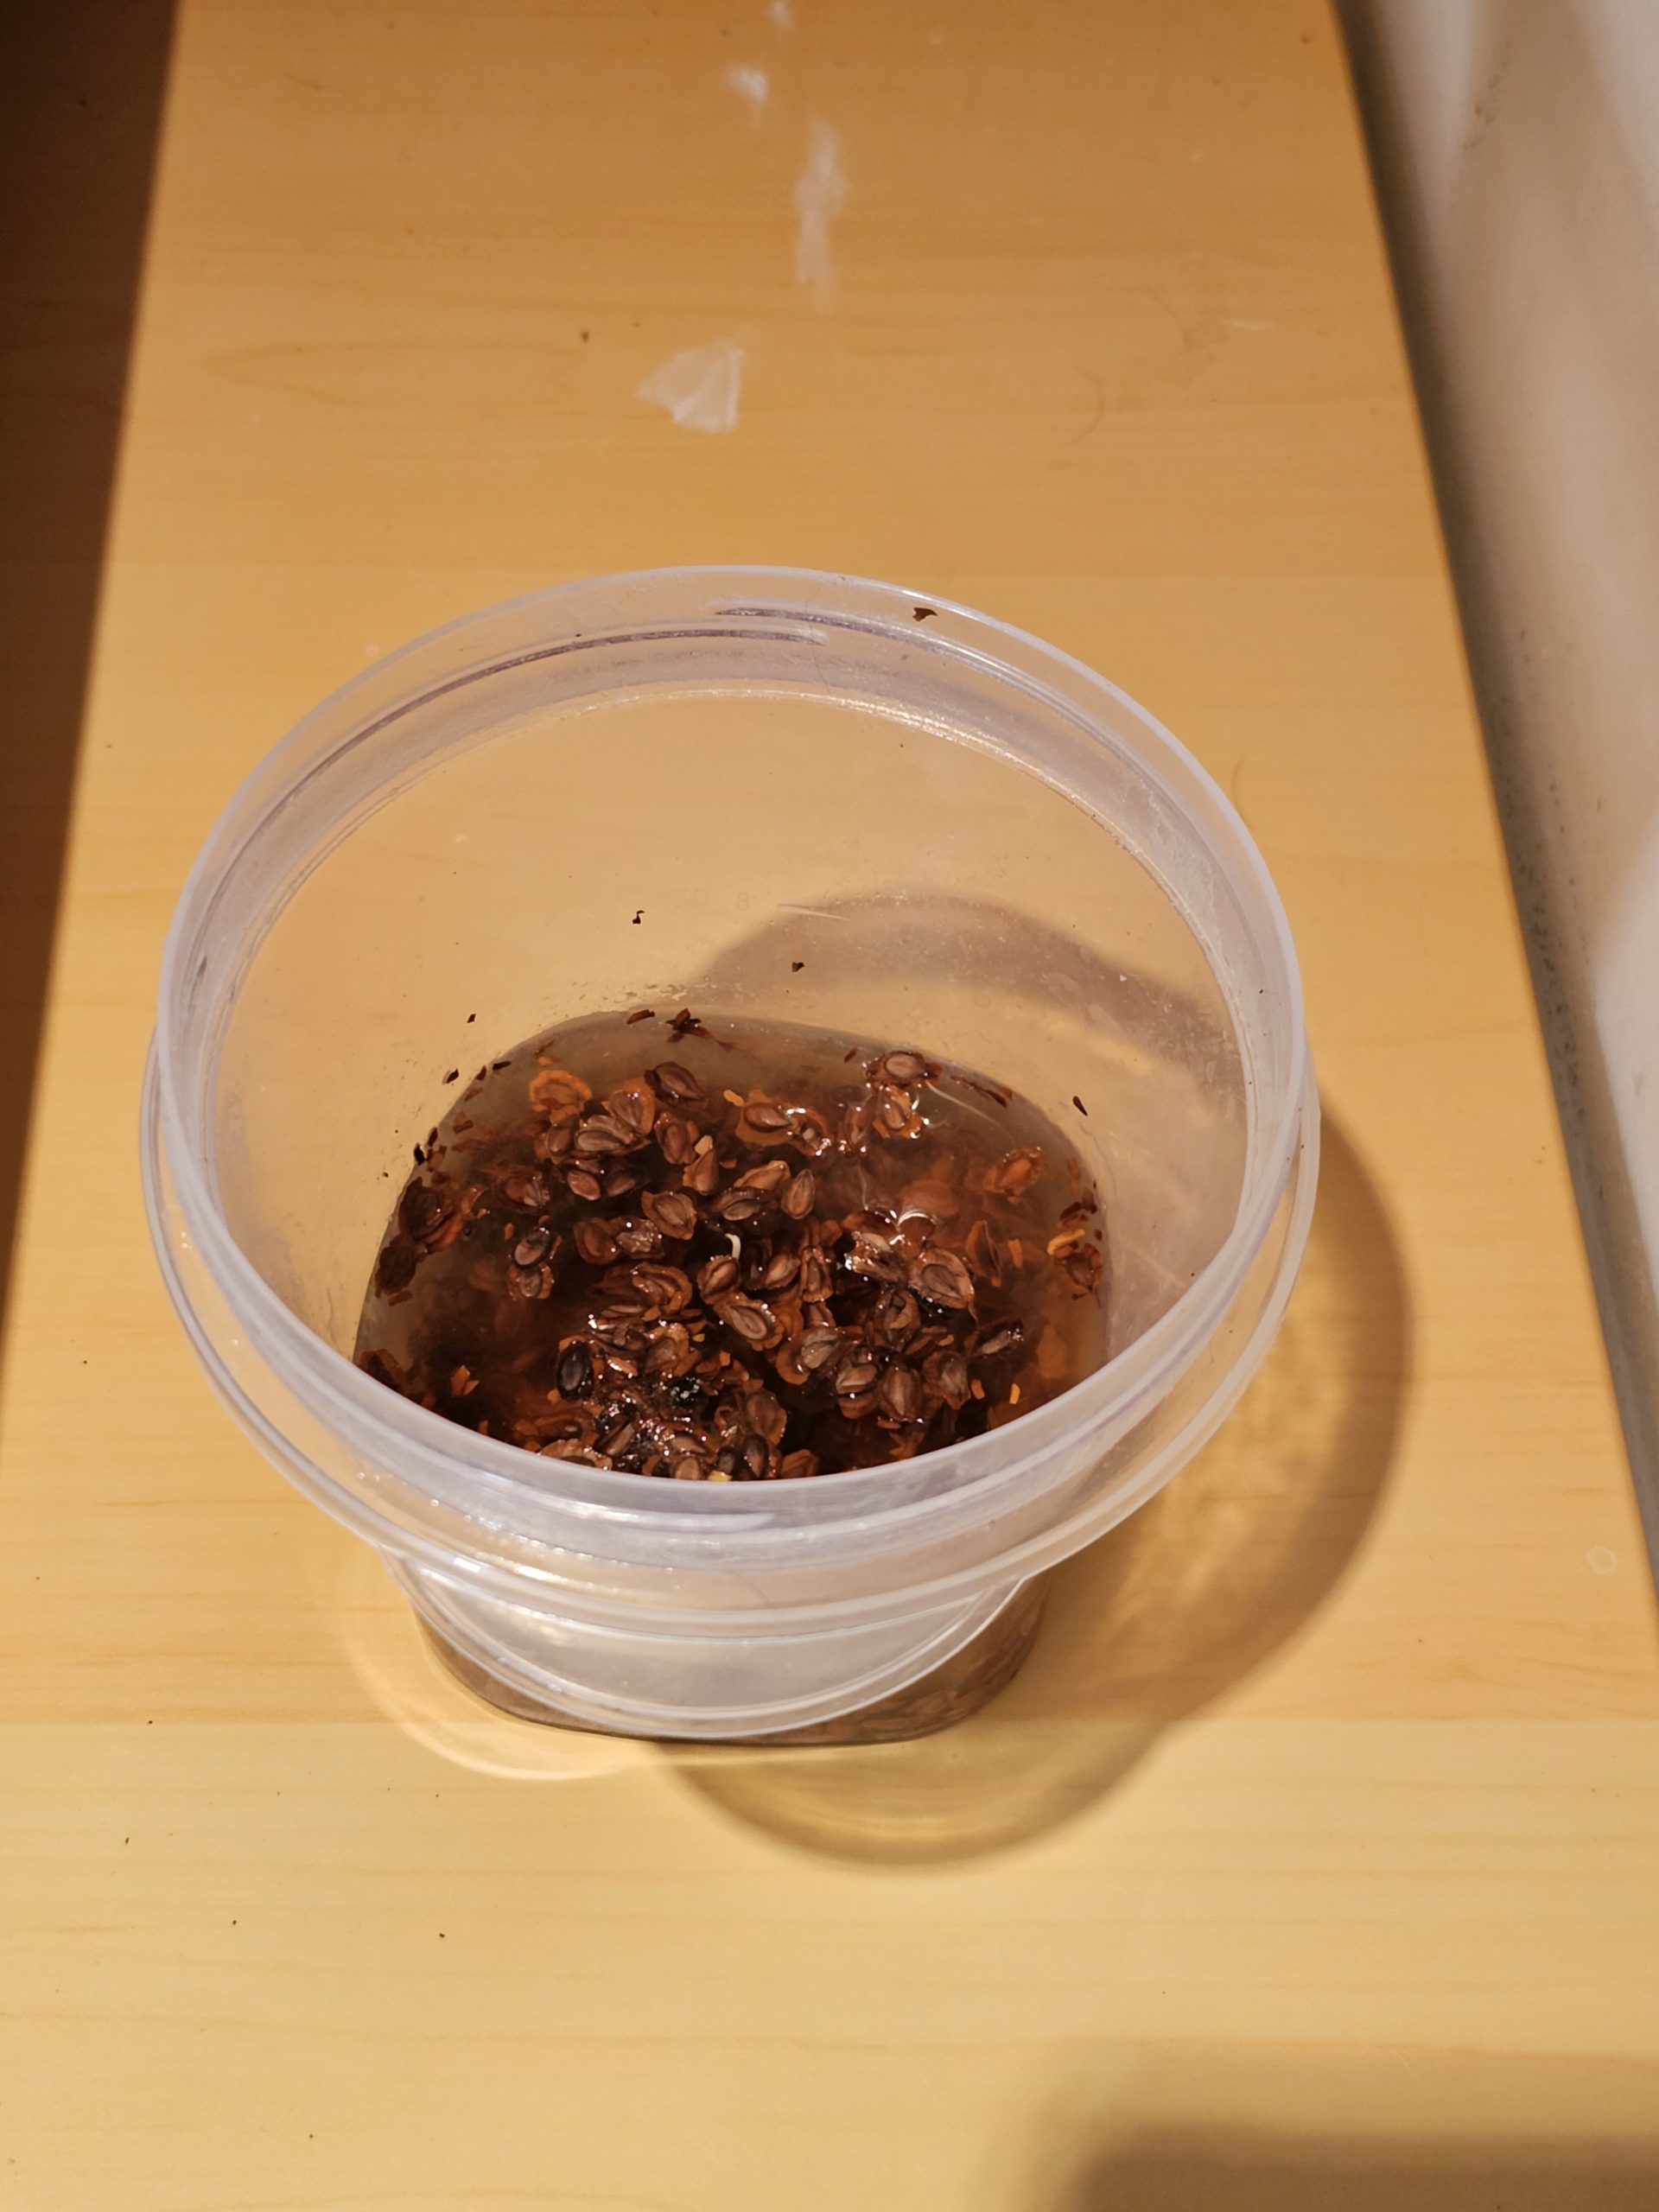
Step 1
Soak swamp milkweed seeds in a small container in distilled water for 3-5 days. I soaked my seeds for 3 days. I feel like 3days is a good time range for soaking the seeds.
Step 2
Fill the mason jar to the 8-ounce line with your potting mix and sprinkle 15 to 25 seeds on the soil’s surface. I like to use Fox Farms Coco Loco Potting Mix for the Magical Sprouts Potion, but feel free to experiment with other potting mixes or soils to see what works best for you.
Spread out the seeds a little bit so they are not all clumped together.
Slowly pour 4 tablespoons of distilled water over the seeds.

Step 3
Sprinkle a little of the Coconut Coir evenly over the seeds. Just make a light dusting. I used Coco Bliss Coconut Coir, which I purchased from Amazon. If you don’t have coconut coir, a small pinch of your potting mix will work too.

Step 4
Place a cellophane sheet or plastic wrap (6X6 size) over the jar. Punch 4 small holes in the center. Brad Grimm sells cellophane sheets on his website with butterfly cutout holes, and I used his cellophane sheets. However, plastic wrap will work just fine. A sandwich bag will probably work as well.

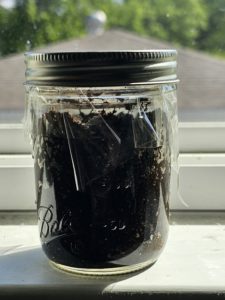
Step 5
Put the ring back on the jar to secure the cellophane sheet or plastic wrap.

Step 6
Place the jar on a sunny windowsill and watch the magic happen! If you don’t have a bright windowsill, you can use a seedling heat mat and a grow light instead. The added warmth and light will help your seeds sprout beautifully.
Keep checking for activity every few days. When you see there are sprouts, mist the soil lightly every couple of days and remember to replace the covering and lid ring.
Once they sprout, you’ll find everything you need to care for them in the “Keep the Magic Growing” section below.

Care Makes the Magic Grow!
Give Them Light
Once your seeds sprout, they’ll need plenty of sunshine to grow.
- Place your jar in a bright window with as much light as possible each day.
- If sunlight is limited, a grow light positioned 2 to 4 inches above the seedlings works just as well.
- A seedling mat can also help by providing warmth. Just check that the soil doesn’t dry out too quickly.
Watering the Right Way
Too much water can spoil the spell.
- When you first set up your jar, you added 4 tablespoons of distilled water, and that is all you need to begin.
- Avoid water for the first 3 days since the jar holds moisture.
- After that, if the soil looks dry, mist lightly or add 1 to 2 teaspoons of distilled water.
Let Them Breathe
Airflow is important to prevent mold and help your sprouts grow.
- Keep the plastic wrap with holes, whether it is cellophane or saran wrap, on the jar or open the jar briefly each day to let in fresh air.
- Once the sprouts grow tall enough to touch the cover or look crowded, you can remove it completely to give them more space and airflow.
Time to Transplant
- Your sprouts are ready for their next magical home when they are 2 to 3 inches tall, have grown a set of true leaves, and you can see roots reaching the edges of the jar.
- To transplant, add a splash of water to the jar to weigh down the soil. Gently tilt the jar on its side and give it a light shake and the root ball and soil should slide out easily.
- Carefully separate the seedlings and place each one into a small pot with good drainage.
- Keep the pots in a bright sunny spot indoors or under a grow light until they are strong enough to move outdoors.
If the Magic Stalls
Light helps trigger germination in many seeds. Without it, they may stay dormant. Once sprouted, seedlings rely on light to grow strong; too little and they can become leggy or stop growing.
Try placing your jar in a sunnier window or use a grow light and seedling heat mat to help them along.
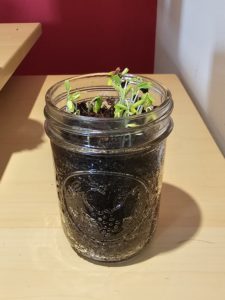
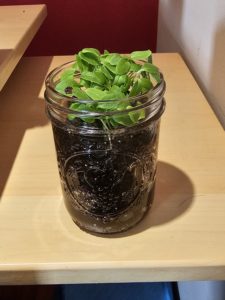
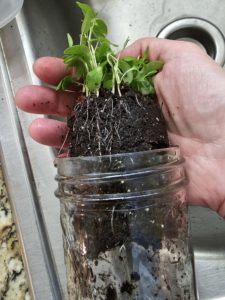
Photos from my Magical Sprouts Potion experiment. I’d say it was a success!

Removing the plants from the jar is easy. Just add some water to the jar to add some weight to the soil.

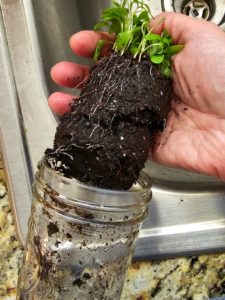
Tilt the jar on its side and give the jar a light shake. The roots and soil will slide right out of the jar.
It’s Easy-Peasy!
After you have removed your plants from the jar, carefully divide them so you can transplant them into a larger container.

I used a 4-inch square pot for my little sprouts.
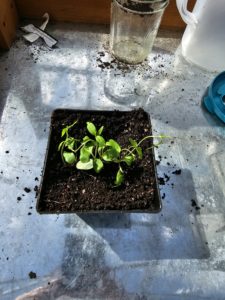
I ended up with four pots of plants from just one jar! Looking back, I probably should have thinned them out more. I could have easily gotten 10 or 12 pots.
